Are you struggling to merge and weld shapes in Inkscape for your next CNC project? Creating clean, precise vector designs can make or break your laser cutting or machining results.
As a CNC enthusiast, I’ve learned that mastering Inkscape’s tools is key to flawless designs. In this guide, I’ll share practical, real-world tips to help you combine paths, weld shapes, and prepare CNC-ready files with ease.
Whether you’re crafting intricate logos or functional parts, Inkscape’s Union and Combine tools will streamline your workflow. Ready to elevate your designs for HYCNC’s precision cutting?
Let’s get started!
Mastering Merging and Welding Shapes in Inkscape for CNC Design
Are you looking to create precise, clean shapes for your CNC projects using Inkscape? Mastering the techniques of merging and welding shapes is essential for preparing your designs for CNC machining or laser cutting. These tools help you combine multiple shapes into one smooth, continuous path that machines can follow exactly. Whether you’re working on a custom sign, intricate artwork, or parts for manufacturing, understanding how to merge and weld shapes in Inkscape will save you time and reduce errors. Let’s break down how these features work and when to use them to get your CNC design just right.
Understanding Merging and Welding in Inkscape
What Are Merging and Welding
In Inkscape, merging and welding shapes are ways to combine multiple objects into one. Merging usually means grouping or layering shapes together without changing their paths, while welding refers to using the Union tool to actually join paths, creating a single continuous shape. Welding removes overlapping lines between shapes, making it perfect for a clean, solid design.
When to Use Each Technique
-
Merging (Grouping): Use this when you want to keep individual shapes editable but move or scale them as one. It’s great during the early stages of design when you’re experimenting with layouts.
-
Welding (Union): Choose welding when you need a single path for CNC projects like laser cutting or routing. It ensures there are no overlapping cuts and gives your machine a clear instruction.
Common Use Cases for CNC Design
- Combining letters or shapes for laser cutting signs or decals.
- Creating smooth, continuous paths for CNC machining to avoid tool path overlaps.
- Preparing vector designs where multiple parts must become one solid piece, ideal for CNC service providers and manufacturers.
Mastering the difference between merging and welding helps you create clean, precise files, saving time and reducing errors in your CNC projects.
Step-by-Step Guide to Merging and Welding Shapes in Inkscape
Setting Up Your Inkscape Workspace
Before you start merging and welding shapes, make sure your Inkscape workspace is ready. Open your design and enable the Path menu and Tool Controls bar for easy access to path operations. Also, turn on the Snap feature to help with precise alignment—this is essential for CNC design to avoid gaps or overlaps.
How to Merge Shapes Using Group
Merging shapes by grouping is the simplest way to keep multiple objects together without changing their individual paths.
- Select the shapes you want to merge.
- Press Ctrl + G or right-click and choose Group.
This keeps your design organized but doesn’t combine the paths, so each shape remains editable. Use this when you want to move or scale shapes as one unit.
How to Weld Shapes Using Union
To weld shapes—meaning to join them into one combined path—you’ll use the Union tool. This is crucial for CNC machining, as it creates a clean, single shape without overlapping paths.
- Select the shapes you want to weld.
- Go to Path > Union or press Ctrl + +.
The result is a single vector path that CNC machines can cut without confusion or extra passes.
Using Combine for Flexible Path Merging
If you need to merge shapes but keep the paths separate for editing, use Combine:
- Select the paths you want to combine.
- Go to Path > Combine or press Ctrl + K.
Combine lets you apply operations like stroke or fill across multiple paths while keeping them linked but editable individually. This is great for detailed CNC projects.
Cutting Shapes with Exclusion
Exclusion is helpful when you want to subtract overlapping areas between two shapes, making one large shape with cutouts.
- Select two overlapping shapes.
- Go to Path > Exclusion.
This removes the intersecting section, which is handy for creating complex CNC designs with holes or negative space.
Troubleshooting Common Issues
- Shapes won’t merge or weld as expected: Ensure shapes are proper paths by selecting them and choosing Path > Object to Path.
- Unexpected overlaps or gaps: Use the Snap tool and zoom in to fine-tune alignment.
- Visual glitches after union or exclusion: Check for duplicate paths or stray nodes by cleaning up paths with Path > Simplify (Ctrl + L).
Using these steps, you can confidently merge and weld shapes in Inkscape, preparing clean, precise vectors ready for CNC machining. For a deeper dive into welding for laser and waterjet cut parts, check out our guide on Welding Tips for Laser and Waterjet Cut Parts.
Best Practices for CNC-Ready Designs in Inkscape
Preparing your designs for CNC machining means making sure they’re clean, precise, and easy for the machine to read. Here’s how to optimize your Inkscape files so they work smoothly with CNC tools like HYCNC.
Optimizing Paths for CNC Machining
- Use Union to Weld Shapes: Combine overlapping shapes with the Union tool to create solid, continuous paths — this avoids confusing the CNC about where to cut.
- Simplify Paths: Reduce unnecessary nodes with the Path > Simplify option. Fewer nodes mean smoother cuts and faster CNC processing.
- Avoid Open Paths: Convert all paths to closed shapes unless you specifically need open paths for engravings or special cuts.
- Check for Overlaps and Gaps: Overlapping paths can cause double cutting. Weld or merge shapes to eliminate these overlaps.
Checking Your Design
Before sending your SVG to HYCNC, double-check these points:
- No Hidden or Locked Objects: Make sure everything you want cut is visible and unlocked.
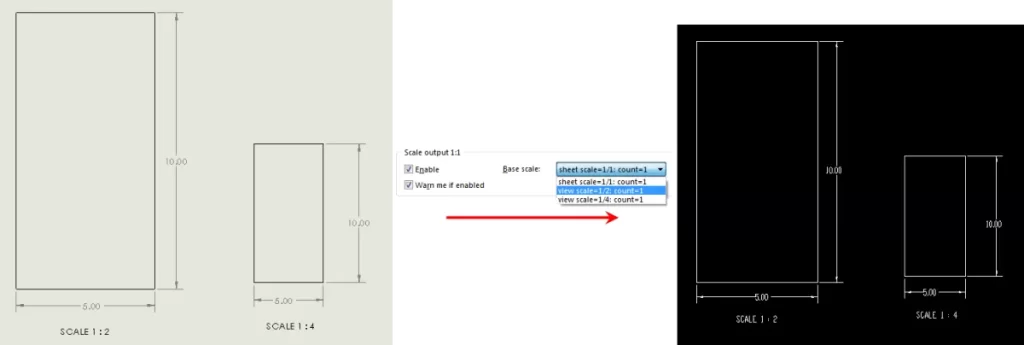
- Correct Scale and Units: Set your document size and units to match your CNC’s requirements, usually inches or millimeters.
- Single Layer for Cutting Paths: Use one layer for the cutting paths to avoid confusion during the CNC process.
- Preview Your Paths: Use Outline Mode (View > Display Mode > Outline) to see the actual cut paths clearly.
Saving and Exporting for HYCNC
- Save as Plain SVG: Export your file as a Plain SVG to ensure compatibility with HYCNC’s software.
- Avoid Raster Images: Keep your design fully vector-based; rasters don’t work for CNC cutting.
- Label Your Files Clearly: Use simple, clear file names with version numbers if needed to stay organized.
- Test Export: Open your exported SVG in another viewer or the HYCNC platform to verify it’s ready to go.
Following these practices ensures your Inkscape designs are clean, accurate, and ready for efficient CNC machining with HYCNC.
Advanced Tips for Merging and Welding
When you’re ready to take your Inkscape designs to the next level for CNC projects, these advanced tips on merging and welding will help you work smarter and cleaner.
Use Boolean Operations and LPE for Non-Destructive Editing
Instead of permanently altering shapes right away, try using Inkscape’s Boolean operations (Union, Difference, Intersection, Exclusion) combined with the Live Path Effects (LPE). This method lets you keep your original shapes editable while previewing merged or welded results. It’s a lifesaver when you need to tweak your design or adjust for CNC cutting paths without starting over.
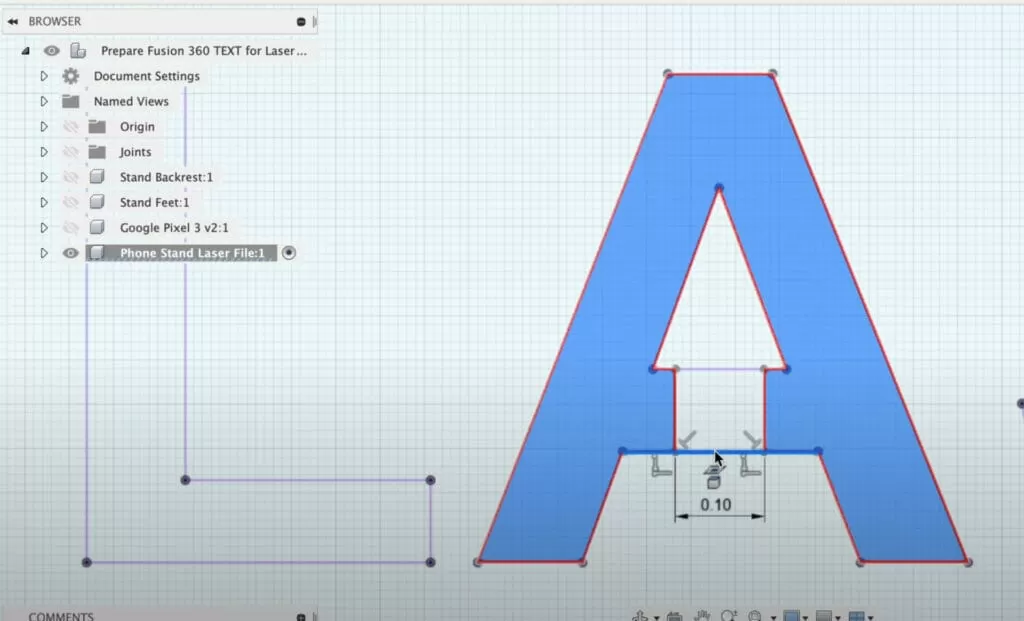
Welding Text for CNC Projects
Regular vector shapes are straightforward, but text needs special care. Convert your text to paths and weld (union) the letters together to create one clean shape. This helps avoid overlapping cut lines or gaps that confuse CNC machines when engraving or cutting. Use the Union tool to combine letters smoothly.
Combine Welding with Snapping for Precision
For precise CNC-ready designs, combining welding techniques with Inkscape’s snapping features is a game-changer. Snap nodes and paths right where you want them before welding to ensure perfect alignment and seamless joins. It reduces cleanup work later and makes your paths CNC-friendly.
Quick Tips:
- Always convert objects and text to paths before welding
- Use snapping to align objects perfectly before merging
- Keep a copy of your original layers before applying permanent path operations
Mastering these advanced tricks means you’ll spend less time fixing issues and more time creating CNC-ready vector designs that cut clean and fast.
Why Choose HYCNC for Your CNC Projects
Seamless Integration with Inkscape Designs
When you’re working with Inkscape for CNC design, HYCNC fits right into your workflow without any hassle. It supports all the common vector formats created in Inkscape, including SVG files that use merged, welded, or combined paths. This means you can design your projects in Inkscape and send them directly to HYCNC without worrying about compatibility issues or needing extra file conversions.
How HYCNC Enhances Your Workflow
HYCNC streamlines the CNC machining process by offering quick turnaround times and precise cutting based on your Inkscape designs. They understand the importance of clean, optimized paths, so your merged and welded shapes translate perfectly into real parts. Plus, their support team is knowledgeable about CNC and vector design, ready to help if you run into any issues.
Choosing HYCNC means less time stressing over file prep and more time focusing on your creative CNC projects. Whether you’re doing laser cutting, milling, or routing, HYCNC helps bring your Inkscape designs to life with accuracy and efficiency.
FAQs
What is the difference between merging and welding shapes in Inkscape?
Merging usually means grouping shapes to move or edit them together without changing their outlines. Welding, or using the Union tool in Inkscape, actually combines shapes into one single path by removing overlapping parts.
When should I use welding instead of merging for CNC design?
Use welding (Union) when you want to create a clean, continuous shape for CNC cutting or laser cutting. Merging (grouping) is fine for organizing your workspace but won’t create a single cut path.
Can I undo welding or union operations in Inkscape?
Yes, you can use the Undo function right after welding, but once you save and close the file, the action becomes permanent. For non-destructive editing, consider using the Live Path Effects (LPE) boolean operations.
What is the Combine tool used for in Inkscape?
Combine lets you join multiple paths into one compound path while keeping their original details. It’s great for preparing SVG files for CNC when you need flexible cutting orders.
How do I fix gaps or overlaps after welding shapes?
Check your nodes and simplify paths if necessary. Use snapping tools in Inkscape to align nodes perfectly before welding to avoid small gaps or unwanted overlaps in your CNC design.
Is Inkscape good for preparing files for CNC machining?
Yes, Inkscape is a solid choice for vector design and preparing clean SVG files for CNC. Just focus on proper path operations like Union, Combine, and Exclusion to ensure your design cuts smoothly.
How do I export a CNC-ready SVG from Inkscape?
After finalizing your design and welding shapes, go to File > Save As and choose “Plain SVG.” This format works best for CNC software like HYCNC to interpret your paths correctly.
Can I weld text in Inkscape for CNC projects?
Yes, convert your text to paths first (Path > Object to Path), then use Union to weld the letters into a single shape. This avoids separate cutting paths for each letter.
If you have more questions about welding shapes or CNC designs in Inkscape, feel free to reach out or explore tutorials tailored for US-based CNC users.