Are you struggling to export files in PTC Creo for your next project? Getting your CAD designs ready for CNC machining can feel overwhelming, especially when file formats or settings don’t cooperate.
As a CNC professional, I know how critical it is to nail the export process for seamless manufacturing. That’s why I’ve created a video guide packed with expert tips to simplify exporting in PTC Creo.
In this post, you’ll discover a step-by-step tutorial to export DXF, STEP, and other formats, optimized for CNC machining with HYCNC. Whether you’re a designer or engineer, this guide will save you time and ensure your files are production-ready.
Let’s dive in and master PTC Creo exports together!
Understanding PTC Creo Export Challenges
Are you struggling with exporting your designs from PTC Creo for CNC machining? You’re not alone. Many users face common export issues that can disrupt their workflow or lead to problems during manufacturing. Understanding these challenges is the first step to smoother, error-free exports.
Common Export Issues in PTC Creo
When working with PTC Creo, some frequent export headaches include:
- File format mismatches: Not all formats work well for CNC machining.
- Data loss or errors: Complex geometry can sometimes get distorted or simplified incorrectly.
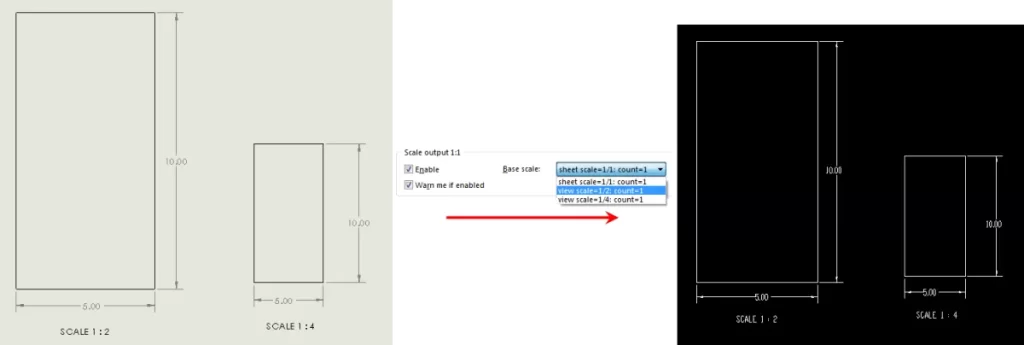
- Scaling problems: Incorrect units or scaling leading to part size errors.
- Unsupported features: Certain Creo features don’t translate properly into export files.
These issues can lead to delays, added costs, and frustration if not handled correctly.
Importance of File Formats for CNC Machining
Choosing the right file format is critical when exporting from PTC Creo. CNC machines rely on precise and compatible files like STEP, IGES, or DXF to read the geometry and toolpath details. Using the wrong format or exporting files with errors can cause:
- Toolpath inaccuracies
- Machining errors
- Longer setup times
- Increased material waste
For optimal CNC machining, always verify your export settings and choose formats preferred by your machine shop. This avoids rework and ensures your parts come out just as designed.
By understanding these challenges and the importance of proper file formats, you’re ready to master exporting in PTC Creo with confidence.
Step-by-Step Video Guide How to Export Files in PTC Creo
Getting your files ready for CNC machining starts with a clean export from PTC Creo. Here’s a simple walk-through on how to do it right.
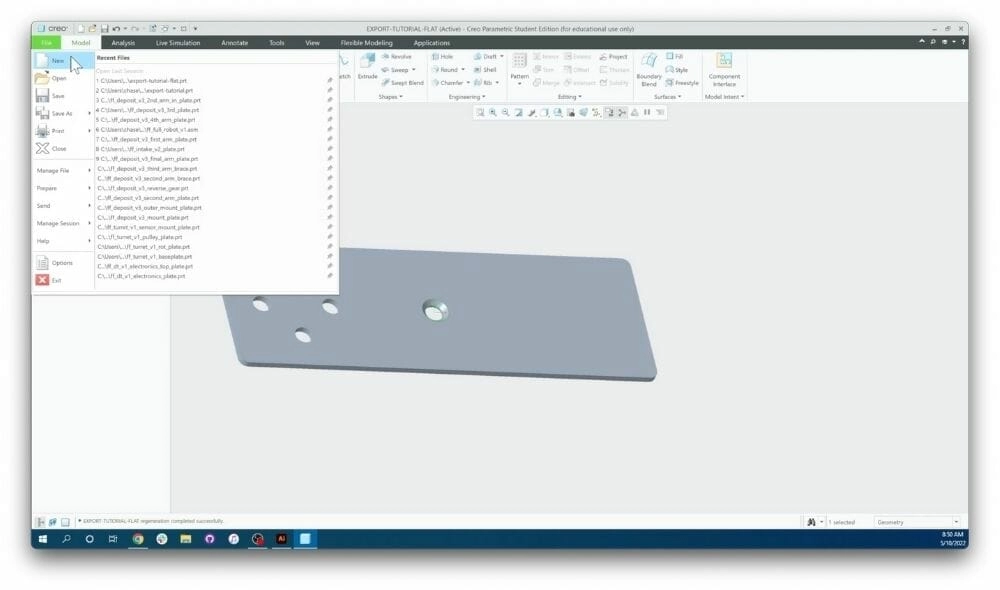
Setting Up Your PTC Creo File
Before export, make sure your model is complete and that all features you want to keep are finalized. Check your units, scale, and layers to avoid any surprises later.
Creating a Drawing for 2D Export
If you need a 2D drawing, create a detailed view in Creo’s drawing module. This step is essential when exporting DXF files or other 2D formats used in CNC machining.
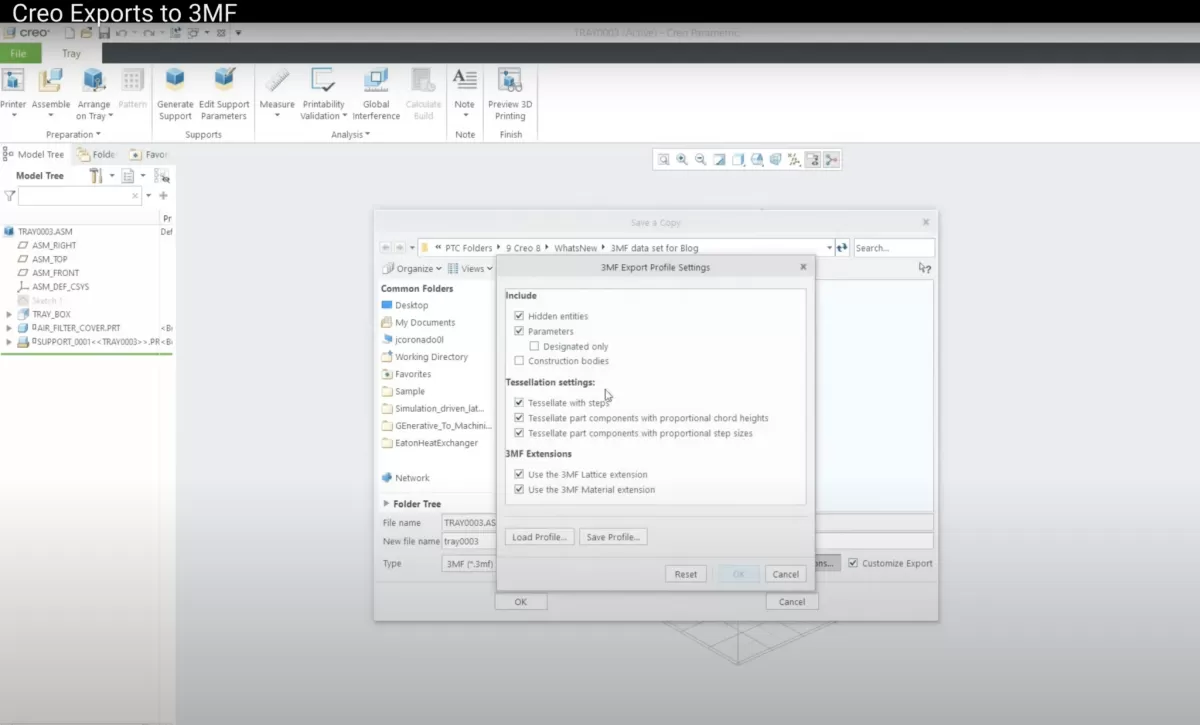
Exporting to Common Formats
PTC Creo supports several export options. For CNC, you’ll often use:
- STEP files for 3D interoperability
- DXF files for 2D drawings
- IGES when you need a neutral CAD format
Use the “Save As” or “Export” option, then select the right format for your machining needs.
Cleaning Up Exported Files
Once exported, open your file in a CAD cleanup tool like QCAD. This helps catch any irregularities or extra geometry that might confuse your CNC machine.
Verifying File Compatibility for CNC
Before sending your files off to a CNC shop, double-check they conform to their software requirements. Confirm layer names, file type versions, and unit measurements match what the machinist expects.
This video tutorial on PTC Creo export shows all these steps, making your file prep smoother and CNC-ready every time.
Tips for Optimizing PTC Creo Exports for CNC Machining
Getting your PTC Creo files ready for CNC machining can be tricky if you don’t follow the right steps. Here are some quick tips to make your exports smooth and error-free:
-
Use Recommended Software for Cleanup
Before sending your files to machining, run them through trusted cleanup tools like QCAD or similar programs. These help fix minor glitches in DXF or STEP files that can cause issues on the shop floor.
-
Avoid Common Pitfalls
Watch out for these common mistakes:
- Exporting without removing hidden or unnecessary layers
- Forgetting to check units and scale before export
- Ignoring file format compatibility with your CNC machine
- Skipping the verification of sketches and dimensions in your export
-
Follow HYCNC’s File Preparation Checklist
At HYCNC, we keep a straightforward checklist to help you prepare Creo files that machine perfectly every time:
- Confirm file format matches CNC requirements (usually STEP or DXF)
- Clean up geometry and remove duplicates
- Double-check scale and units
- Preview exported file in a viewer or CAD software for any errors
- Send files with clear notes if any special instructions apply
Following these tips will save time, reduce errors, and ensure your CNC projects come out exactly as planned. For a deeper look, check out the full PTC Creo export tutorial video we offer—it covers all these points step by step.
Why Choose HYCNC for CNC Machining
When it comes to CNC machining, choosing the right partner makes all the difference. HYCNC stands out because of its seamless integration with PTC Creo exports. Whether you’re exporting STEP files or DXF drawings, HYCNC handles your Creo files quickly and accurately, saving you time on file preparation.
Here’s why HYCNC is the smart choice:
- Smooth File Handling: HYCNC accepts commonly used PTC Creo file formats, ensuring your exports work without a hitch.
- Instant Pricing: Get real-time quotes based on your uploaded Creo files. No more waiting around for estimates.
- User-Friendly Support: Have questions on preparing your Creo files or CNC machining? HYCNC’s expert team is ready to help fast.
If you want CNC machining that aligns perfectly with your PTC Creo exports, HYCNC is the go-to solution. Upload your files today to experience hassle-free CNC service backed by instant pricing and reliable support.
FAQs
How do I export DXF files in PTC Creo?
To export a DXF file, open your drawing in Creo, go to File > Save As > Save a Copy, and select DXF as the file format. This is perfect for 2D CNC machining needs.
What file formats are best for CNC machining from PTC Creo?
Common formats include STEP, IGES, and DXF. STEP is widely used for 3D data, while DXF is great for 2D cutting paths. Always check your CNC machine’s requirements before exporting.
How can I clean up PTC Creo export files for CNC?
Use software like QCAD to fix any issues with DXF files. Removing unnecessary layers or overlapping lines ensures smoother CNC machining.
Why might my exported Creo file not work on the CNC machine?
Compatibility issues often come from unsupported file formats, scale mismatches, or incomplete geometry. Always verify your exported file with the CNC software or service provider.
Is there a video tutorial that shows how to export in PTC Creo?
Yes, plenty of clear video guides are available online that walk you through exporting STEP, DXF, and other formats from Creo. These tutorials are great for beginners and help avoid common export mistakes.
What is the best practice for exporting Creo files for CNC manufacturing?
- Double-check your model and drawings are finalized
- Choose the correct file format for your CNC process
- Clean up exports using recommended software
- Verify compatibility with your CNC service before sending files
If you want a streamlined experience, our HYCNC team can help with file preparation and support to ensure your Creo exports meet all machining requirements.