Why Welding and Merging Shapes Matters for CNC and Laser Cutting
If you’re designing for CNC machining or laser cutting, welding and merging shapes in Adobe Illustrator isn’t just a nice-to-have—it’s essential. When your vector shapes overlap or have duplicate paths, the cutting machine might interpret those overlaps as separate cuts. This can lead to wasted material, longer cutting times, or even damage to the final piece.
Welding or merging vector shapes ensures your design is a clean, single piece with smooth edges. It removes hidden overlaps and disconnects that confuse CNC services and laser cutters. This not only saves on production costs but also improves the precision of your final product.
By combining shapes correctly, you create stronger, more efficient designs that cut faster and look professional. Whether you’re making signs, parts, or custom art, mastering welding and merging ensures your files are ready for any CNC or laser cutting service, including platforms like HYCNC.
Tools for Welding and Merging Shapes in Illustrator
When working with vector shapes in Illustrator, especially for CNC and laser cutting, using the right tools to weld and merge shapes is a must. These tools help you combine shapes in Adobe Illustrator cleanly, ensuring your design cuts smoothly without overlapping or gaps.
Pathfinder Panel
The Pathfinder panel is one of the most popular tools for merging vector shapes in Illustrator. It lets you add, subtract, intersect, or exclude shapes with simple clicks. For welding shapes for laser cutting, the “Unite” option combines multiple shapes into a single vector path, which is perfect for creating solid, connected designs.
Shape Builder Tool
The Shape Builder tool is a hands-on method for merging shapes. It lets you click and drag across overlapping areas to combine or remove parts of shapes. This tool feels more intuitive if you prefer to work directly on the shapes, making it easy to merge vector shapes and clean up Illustrator paths on the fly.
Compound Paths
Compound paths allow you to merge multiple outlines into one path that behaves as a single object but can have transparent or “cut-out” holes. This is especially useful when designing complex CNC parts or laser cut projects where you want to keep internal cutouts within welded shapes.
Blob Brush Tool
While not a traditional welding tool, the Blob Brush tool lets you paint filled shapes that automatically merge with existing shapes of the same color. It’s a quick way to add and weld freeform shapes seamlessly, offering a creative option to combine shapes in Adobe Illustrator without extra steps.
Using these tools correctly helps you prepare Illustrator files for CNC and laser cutting by ensuring paths are merged, clean, and ready for smooth cutting or machining. If you’d like a closer look at preparing files specifically for laser cutting, check out designing for laser cutting Illustrator for more tips.
Step-by-Step Guide to Welding and Merging Shapes in Illustrator
Step 1 Set Up Your Illustrator File
Start by opening your file and making sure all the shapes you want to weld or merge are on the same layer. Set your artboard size to match your CNC or laser cutter requirements. This helps avoid scaling issues later on. Also, convert any strokes to fills (Object > Path > Outline Stroke) so your shapes behave as solid areas.
Step 2 Using the Pathfinder Panel
Select the shapes you want to combine. Open the Pathfinder panel (Window > Pathfinder). Use Unite to weld overlapping shapes into one solid shape. This is great for merging vector shapes in Illustrator quickly. You can also try Minus Front, Intersect, or Exclude for different effects depending on your design needs.
Step 3 Using the Shape Builder Tool
With your shapes selected, switch to the Shape Builder Tool (Shift + M). Click and drag across overlapping areas to merge them seamlessly. This tool gives you more control than Pathfinder, letting you merge only specific parts. It’s especially handy if you want to weld shapes for laser cutting without losing particular cutouts.
Step 4 Creating Compound Paths
To cut holes or create complex shapes, select your objects and go to Object > Compound Path > Make. Compound paths treat multiple shapes as one object, defining transparent areas that CNC routers and laser cutters will interpret correctly. This step is crucial for intricate designs.
Step 5 Clean Up Your Design
Remove duplicate or unwanted paths to avoid confusion during cutting (use Object > Path > Clean Up). Check for stray anchor points and smooth out jagged edges using the Direct Selection Tool. A clean Illustrator file means fewer errors and a smoother CNC machining or laser cutting process.
Step 6 Export for CNC Laser Cutting
Finally, save your file in a suitable format like SVG, DXF, or PDF, depending on your CNC or laser cutting service requirements. Make sure the paths are all merged or compounded properly to prevent any cutting issues. Double-check your artboard size matches the output scale before exporting.
Following these steps ensures your design is ready for production with clean, merged shapes that CNC and laser cutters can interpret without any problems.
Common Mistakes and How to Avoid Them

Welding and merging shapes in Illustrator for CNC and laser cutting isn’t too hard, but it’s easy to make some common slip-ups. Here’s what to watch out for and how to fix them:
Overlapping Paths Not Fully Welded
Sometimes shapes overlap but don’t actually combine. This can cause double cutting or weak spots in your design. Make sure to use the Pathfinder tool’s “Unite” option or the Shape Builder tool properly to fully merge shapes.
Not Cleaning Up Duplicate or Hidden Paths
Leftover duplicate paths or hidden anchor points can confuse your CNC or laser cutter. Use the “Clean Up” function (found under Object > Path > Clean Up) and manually delete extras to prevent cutting errors.
Incorrect Compound Path Use
Compound paths are essential for cutouts and holes. Forgetting to create a compound path might result in unwanted fills or no cut at all. Always use “Make Compound Path” (Cmd/Ctrl + 8) when you want overlapping areas to punch out.
Ignoring Stroke vs Fill Settings
Cutting machines usually follow stroke outlines or fills differently. If your design has a stroke instead of a fill, it can cut twice or miss cuts. Convert strokes to outlines (Object > Path > Outline Stroke) before merging.
Forgetting to Check Scale and Units
If your file uses inconsistent units or is scaled incorrectly, parts might be off when loaded into the CNC or laser software. Confirm your artboard and design use the same unit system and match your machine’s requirements.
Not Exporting in the Right Format
Incorrect file formats or settings can mess up your final cut. Always export your design as a clean vector file like SVG, DXF, or AI per your CNC service’s specs. Check out tips on exporting vector files from 3D shapes for laser cutting for more details.
Avoiding these mistakes will save you time, money, and headaches, especially when preparing Illustrator files for CNC and laser production.
Advanced Tips for Professional Designs
When you’re welding and merging shapes in Illustrator for CNC or laser cutting, going beyond basic tools can really boost your designs. Here are some advanced tips I use to make sure my artwork looks clean and cuts perfectly every time:
-
Use Simplify Path to Reduce Points
After merging shapes, clean up your paths by going to Object > Path > Simplify. This trims unnecessary anchor points, making the file lighter and easier for CNC or laser machines to handle.
-
Check for and Remove Duplicate Paths
Overlapping or duplicate paths can confuse cutting machines. Use the “Remove Duplicate Paths” feature (or manually check in Outline view) to keep your design tidy and error-free.
-
Create Compound Paths in Strategic Spots
Compound paths let you make holes or complex cutouts inside your merged shapes. Use them to prepare designs with internal cutouts that’ll cut precisely on CNC or laser setups.
-
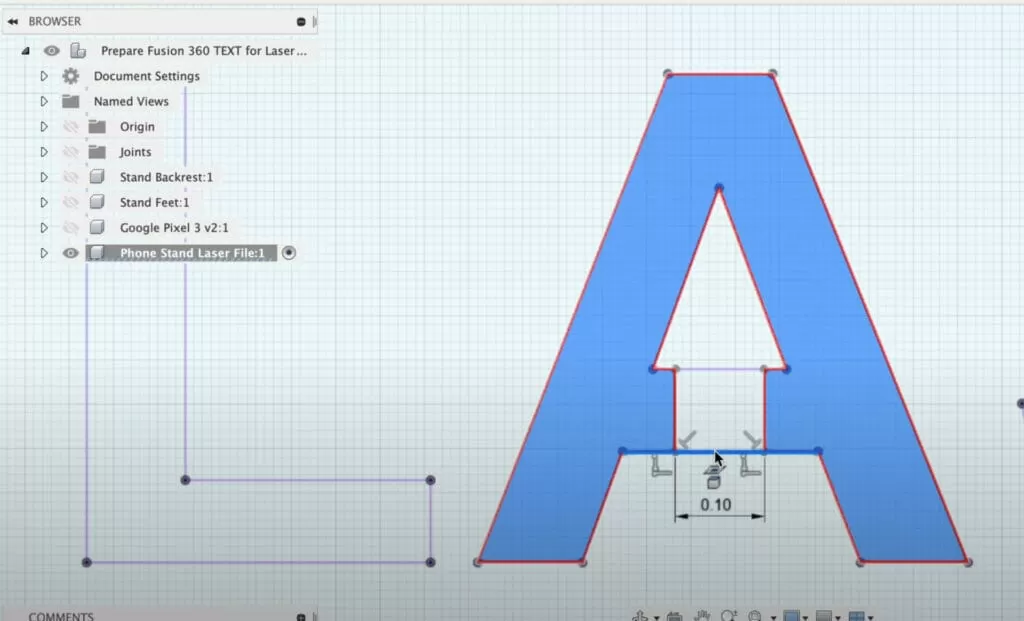
Use Smart Guides and Snapping
Turn on Smart Guides (View > Smart Guides) for precise alignment when welding shapes. Snapping helps avoid tiny gaps or overlaps that mess up your cut lines.
-
Work with the Blob Brush Tool for Custom Shapes
Sometimes it’s easier to sketch merged shapes freehand with the Blob Brush. This tool automatically welds new strokes to existing ones, making organic shapes simple to create.
-
Pre-Test with a Low-Power Laser or Preview
Before sending files to CNC or laser machines, run a low-power test or use Illustrator’s Outline mode to verify clean welds and merged paths.
-
Keep Your File Organized
Name layers and group merged shapes clearly. Organized files mean quicker edits and fewer mistakes when prepping designs for production.
Following these tips helps you create professional, error-free vector files that work smoothly with CNC and laser cutting services across the U.S. It’s not just about combining shapes in Adobe Illustrator—it’s about preparing smart, clean designs that save time and reduce waste on the shop floor.